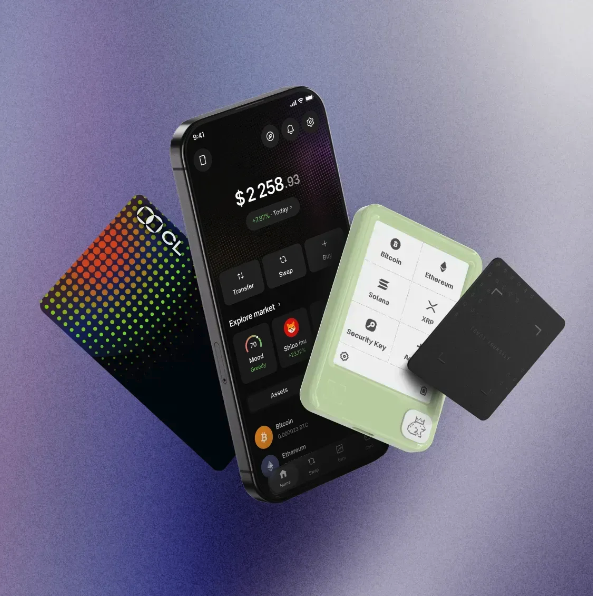
Congratulations on taking the first step toward securing your cryptocurrency with a Ledger Nano S Plus! As one of the most popular hardware wallets on the market, the Ledger Nano S Plus offers robust security for your digital assets. If you're new to hardware wallets, this step-by-step guide will walk you through the entire setup process from unboxing to receiving your first crypto.
What You'll Need Before You Start
Before diving into the setup, make sure you have:
Your Ledger Nano S Plus device
The USB-C cable included in the box
A computer (Windows 10+, macOS 10.14+, or Linux) with internet access
A quiet, private space where you won't be interrupted
Something to write on (paper and pen) for your recovery phrase
Important: Never set up your Ledger in a public place or where cameras might be present. Your recovery phrase is the key to your funds.
Step 1: Unbox and Inspect Your Device
When you first receive your Ledger Nano S Plus, take a moment to verify that everything is in order:
Check the packaging seal — The box should come with a tamper-evident seal. If it's broken or missing, contact Ledger support immediately.
Verify the contents — Inside you should find:
Ledger Nano S Plus device
USB-C to USB-A cable
Getting started leaflet
Recovery phrase sheets (3 pieces)
Inspect the device — Look for any signs of physical tampering, scratches, or damage.
Step 2: Download and Install Ledger Live
Ledger Live is the official companion app that lets you manage your crypto assets, install apps, and update your device's firmware.
Go to the official Ledger website: ledger.com/ledger-live
Always double-check the URL. Phishing sites often mimic Ledger's website to steal your funds.
Download the version compatible with your operating system (Windows, macOS, or Linux)
Install the application by following the on-screen instructions
Launch Ledger Live once installation is complete
Step 3: Initialize Your Ledger Nano S Plus
This is the most critical part of the setup process. Take your time and follow each step carefully.
3.1 Power On the Device
Connect your Ledger Nano S Plus to your computer using the USB-C cable
The device will power on automatically and display "Welcome to Ledger Nano S Plus"
Press both buttons simultaneously to begin setup
3.2 Set Up as a New Device
Use the left/right buttons to navigate to "Set up as new device"
Press both buttons to confirm
3.3 Choose Your PIN Code
The PIN code protects your device from unauthorized physical access.
Select "Choose PIN code"
Use the left and right buttons to scroll through numbers (0-9)
Press both buttons to select a digit
Choose a 4 to 8-digit PIN code — we recommend at least 6 digits for security
Confirm your PIN code by entering it again
Tip: Pick a PIN you can remember but isn't obvious (avoid birthdays or 123456).
3.4 Write Down Your Recovery Phrase
This is the most important step. Your recovery phrase (also called a seed phrase) is the backup for all your crypto assets. If you lose your device, this phrase is the only way to recover your funds.
The device will display "Recovery phrase" — press both buttons to continue
It will show "Write down your recovery phrase" — confirm by pressing both buttons
Word by word, the device will display 24 words in sequence
Write each word down exactly as shown on the physical recovery sheet provided
Pay attention to spelling and word order
Write clearly — you'll need these words exactly as they appear
After each word, press both buttons to move to the next one
Once you've written all 24 words, the device will ask you to confirm your recovery phrase
It will ask you to enter specific words from your phrase (e.g., "Word #7")
Use the buttons to select the correct word and confirm
CRITICAL SECURITY RULES FOR YOUR RECOVERY PHRASE:
Never take a photo or screenshot of your recovery phrase
Never store it digitally (not in notes, cloud storage, or email)
Never share it with anyone — Ledger support will never ask for it
Store it in a secure, offline location like a safe or safety deposit box
Consider making multiple copies stored in different secure locations
Step 4: Complete the Setup on Your Device
After confirming your recovery phrase:
Your device will display "Your device is ready"
Press both buttons to continue
You'll see the Ledger dashboard — this means your device is successfully initialized!
Step 5: Connect Your Device to Ledger Live
Now let's pair your device with the Ledger Live app.
Open Ledger Live on your computer
Click "Get started"
Select "I already have a device"
Choose Ledger Nano S Plus from the list
Follow the on-screen checklist to confirm you've completed the setup steps
Click "Check my device"
If prompted, unlock your Ledger device by entering your PIN code
Ledger Live will verify that your device is genuine
This genuine check ensures your device hasn't been tampered with.
Step 6: Set a Password for Ledger Live
For added security, set a password to lock the Ledger Live app:
When prompted, choose a strong password
Confirm the password
Optionally, you can set the auto-lock timer
Step 7: Install Crypto Apps on Your Device
The Ledger Nano S Plus supports over 5,000 cryptocurrencies and tokens. Each crypto asset requires its own app installed on the device.
In Ledger Live, go to the "My Ledger" tab
Unlock your device if prompted
On your device, press both buttons to "Allow Ledger manager"
You'll see a list of available apps in the App catalog
Find the crypto you want to add (e.g., Bitcoin, Ethereum, Solana)
Click "Install" next to the app
Wait for the installation to complete (usually a few seconds)
Repeat for each cryptocurrency you want to manage
Note: The Ledger Nano S Plus has plenty of storage space and can hold over 100 apps simultaneously.
Step 8: Add Accounts in Ledger Live
After installing the apps, you need to add corresponding accounts in Ledger Live:
Go to the "Accounts" tab
Click "Add account"
Select the crypto asset you want to add (e.g., Bitcoin)
Make sure the corresponding app is open on your Ledger device
To open an app: navigate to it on the device dashboard, then press both buttons
Click "Continue"
Ledger Live will sync with your device and create the account
Name your account (optional)
Click "Add account" to finish
Step 9: Receive Your First Crypto
Now you're ready to receive cryptocurrency into your secure hardware wallet.
Go to the "Accounts" tab
Select the account you want to receive crypto into
Click "Receive"
Select the correct account and click "Continue"
Open the corresponding app on your Ledger device
On your device, verify that the address displayed matches what's shown in Ledger Live
Always verify addresses on your device screen — never trust only the computer screen.
If the addresses match, press both buttons on your device to "Approve"
Copy the receiving address from Ledger Live
Use this address to send crypto from your exchange or another wallet
Pro Tip: For your first transaction, send a small test amount first to confirm everything works correctly.
Essential Security Best Practices
Do:
Always verify addresses on your device screen before confirming
Keep your recovery phrase in a secure, offline location
Regularly update your device firmware and Ledger Live
Double-check URLs when downloading software or accessing crypto services
Use a strong PIN code that's at least 6 digits long
Don't:
Never share your recovery phrase or PIN with anyone
Never enter your recovery phrase on a computer or website
Never take photos or screenshots of your recovery phrase
Never buy a used Ledger device — always buy new from official sources
Never click links in unsolicited emails or messages claiming to be from Ledger
Troubleshooting Common Issues
Device Not Recognized by Computer
Try a different USB port or cable
Make sure you're using the official Ledger USB cable
Restart Ledger Live and reconnect the device
Forgot Your PIN Code
If you enter the wrong PIN 3 times, the device will reset
You'll need your recovery phrase to restore your funds
Set a new PIN after resetting
Recovery Phrase Verification Failed
Double-check your spelling and word order
Make sure you're using the correct word number
Go back and re-write your phrase carefully if needed
App Installation Failed
Ensure your device is unlocked and on the dashboard
Check your internet connection
Try updating Ledger Live to the latest version
Wrapping Up
Setting up your Ledger Nano S Plus for the first time might feel intimidating, but by following this guide step by step, you've taken a huge leap toward securing your crypto assets. Remember: the security of your funds ultimately depends on how well you protect your recovery phrase and follow best practices.
Your Ledger Nano S Plus is now ready to securely store, send, and receive cryptoc